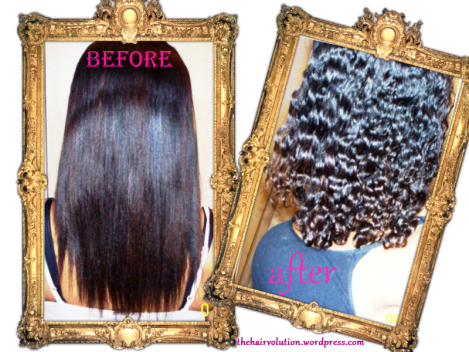
These pictures were taken in 2011. Results may vary depending on length, texture, and products used.
My #1 look for the summer! This is a very flattering hairstyle that is easy to do and manage. I do my braid-out after shampooing/conditioning and can usually stretch it to last for about 4-5 days. This is also a perfect protective style, since there is no added manipulation required besides applying your daily moisturizer and re-braiding before bed. Braidouts done on wet hair is recommended for the best outcome. And…..this style is great for ALL hair types and lengths!!
What You’ll Need:
*Freshly shampoo’d and conditioned hair
*Spray Bottle (filled with cold water)
*Leave-in Conditioner
*Curl Cream/Gel (click here to see what I use)
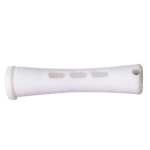
*Eight 7/16-inch Cold Wave Rods (see picture at the end of this article)
*Rat tail comb for parting, and wide tooth comb to detangle
*Hooded dryer or air-drying time <–recommended
*Serum (optional for anti-frizz and shine)
Step 1: Detangle your hair and finger-part into four sections, 2 in the front and 2 in the back.
Step 2: Now take the first section and separate into two smaller sections. Re-wet if damp. Add a small amount of leave-in, curl cream, then serum. Massage into strands, detangle again if necessary and braid from root to tip. Roll the end of the braid with a rod. Repeat above steps for the other braid in that section.
Step 3: Continue with all of the above steps on the other sections of the hair. Remember to re-wet as needed. Damp hair does not result in a deep wave pattern–so dripping wet hair is ideal in this case. When done with steps 1-3, you should have a total of 8 braids with rods of the ends of each.
Step 4: Smooth edges and sit under a hooded dryer until hair is completely dry. IF AIR DRYING, allow hair to dry naturally for 2-4 hours. I air dry to avoid heat-damage. Actually, I think the results are better and bouncier this way.
Step 5: Once hair is completely dry, carefully remove rods and slowly un-braid. Do not rush this step, because it will result in frizzy hair. You’ll see a really nice wave pattern by taking your time to un-braid.
Last Step: After all hair is un-braided, fluff each section with your fingers or the end of a rat-tail comb. Then, I recommend going crazy with the head shake for gorgeous volume. Voila!! You’re a star baby!!
TIPS:
Drying: Hair that is not completely dry will result in a frizzy mess and you’ll be soooo mad at yourself for rushing. This is the most important tip.
Finger Styling: To preserve the effectiveness of this protective style, boycott combing while wearing a braid-out. I just use my fingers for fluffing and styling during the week, which helps the wave last longer and also gives your hair a much needed rest.
Re-wetting hair: Use cold water, which seals the cuticle and results in shinier hair.
Using rods: Use extra water and curl cream to ends for the best curl definition. Apply/remove rod carefully to avoid damage.
Parting: Do more than 8 braids for smaller waves and more volume. Do less than 8 braids for bigger waves. Part hair with your fingers to give a more natural look. Using a comb will likely resulted in visible parts throughout your head, very inauthentic…trust me on this one.
Product Usage: Be careful if you’re heavy-handed. Using too much of any of the products will weigh your hair down and take away from the bouncy, full look of this style.
Maintenance: This style can easily last about 4-5 days. Each night, apply your moisturizer from the root to the tip–be sure to get all of your hair. Then re-braid dry hair in as many sections as you want. Re-rod is necessary. Take the braids down in the morning, finger fluff, tame edges, and go!
Shortcut:
A braidout can also be done on dry hair. I’ve done this by finger parting, spraying water on each section, then adding the other products right before braiding and rodding. Remember, results vary based on your hair texture, length, and type of products used. Here’s my braidout on dry hair using Garnier Fructis Curl-Sculpting Gel, leave-in conditioner, and icy cold water:
![]()


how do you keep your ends from thinning while doing braid outs?
You have to make sure that your ends are in top notch condition for healthy hair growth, so that makes it easier to rock a braid out without thinning ends. I use a heavy cream on the ends after braiding, then roll with a small white rod to achieve the curl and bounce.